Showing posts with label DIY. Show all posts

Scooter Update: Painting Part 2

Hello everyone,
Between Ninja con this past weekend and a few career changes, my scooter has unfortunately been pushed to the side. I wanted to update you on the progress of the painting and the steps that I've taken. I'm almost finished with the entire body of the scooter, with a few mess ups here and there. Hopefully you can learn from my mistakes. This post is going to focus on the prep work before the paint work. This is the messiest and most exhausting part of the process, but gives you the greatest pay off in the end. I'll dive right into it:

Removing the parts: I know that this seems like a no-brainer, but it was actually harder than I thought it would be.  Scooter parts are layered on each other to provide a sleeker put together look. Be very careful as to what you remove, you would do yourself a favor if you can get yourself an extra hand. The better of a handle you have on the parts, the less likely you will spread or make any new crack to the body. Another thing that you need to be careful about is grease and dirt build up. It can easily deceive you that the part is stuck to something or needs extra force to pry. I know this was especially a problem on the bottom part of my bike. Some cases, you will also go through corroding issues where bolts have completely locked in to the bike and won't release the body part due to rust. I had this happen to the fender, and I was able to get it free with the handy use of my chisel and a hammer. I had to sacrifice the bolt because of it, fortunately it was a standard bolt.

Speaking of bolts, keep your excess smaller parts in a safe place. I simply put mine in a plastic cup off to the side. You can also keep track of all of the bolts with your mechanic manual, allowing you to put the pieces back in the right place.

Evaluating the damage:
Once you have everything off, you'll have to take a look at what work needs to be done. You might have some major gashes and scratches, or you might find plenty of cracks in your body. One thing that I wish I knew before the project was to work on the parts with the worse damage first. You really want to make sure that the extra bonding bits dry well and that you give yourself plenty of time to sand them down. I'll touch more on this later on.

She's a natural red head!
Cleaning and chisel work: I started to get to work on my bike by spraying it down with water and that Awesome degreaser that I had mentioned in the first post. Start on the surface first and move towards the inner parts last. It turned into a really messy paste like substance after the end of it. Be generous with your degreaser if you have to, and let it set. This will do most of the work for you. When using your brush, go in a circular motion. It lifts the grease easier and gives you a deeper scrub.

I found the chisel really useful for dried on gunk. The scooters emblems were these really thick resin stickers that were painted over (I found out that Lucky was originally red!) by the blue coat that was over the scooter. The previous owner also kept the scooter together with some duct tape. The chisel really helped to get these things off of the scooter without any extra damage. It was a very slow process, but the results were a smooth surface without any buildup.

Rough sand: Take that 60 or 80 grit and get rid of all the major gashes you might have. This was such a life saver for the bottom of the scooter and the edges that looked like they were gashed when the bike dropped. Be careful around parts that have a crack in them, you might want to wait before you file those down in case all that you need is filler or a patch to even it out. Also be weary of sanding a surface to thin, if a gash is very deep and on the thin side, reach for the filler first.

Filler and patching: These will be one of a few steps that you will need to be very patient with. The drier the epoxy bond is, the easier it is to work with. It also gives you a smoother surface when you wet sand it to work with. I like to give my time to set at the very least half the day, but I would recommend up to 24 hours.

When laying out your patching, try to find the balance between thick and thin. It just creates a better seal. Too think will make the patch brittle, and too thick will destroy its flexibility. I think another great tip I learned is to give yourself a 5 minute working time frame with the epoxy, if you have to work in smaller sections do so. It will give you less to sand in the finished product.

Final wet sand: When everything has dried, start giving it the final sand with the finer grit sandpapers. It also helps immensely to get yourself a wet sandpaper. Working a little water on the surface with the sandpaper allows you to see all the details and any minor scratches you might not have caught. When your sure your finished (or absolutely tired) give yourself a few hours to let the left of residue dry and wipe the surface with a dry paper towel.

Some painting preview
 Last thoughts or tips:
  • Always double check your cracks which you filled in case of some minor spider cracks you missed.
  • I can't reiterate enough to be patient with the chisel. Watch some Netflix if you have to.
  • You might have to fine sand more than once, or go back and repeat steps to get the desired smoothness.
  • Make a day out of the epoxy. Dust and glue are a terrible combination.
  • Pace yourself. It's so easy to get caught up in wanting to finish the project. But the slower you are, the more aware you'll be of detail.

I think that this is all that I can really say about the prep process. Next we'll get to move onward to the painting! Thank you for joining me on this journey, hopefully this will help some of you other painting armatures like me out there.

Cheers!
0

Scooter Update: Painting Part 1


My Dad and me taking the body off of Lucky
Hi everyone,
This past weekend has been a doozy for me and I'm always happy to return here to be in the little corner of the internet with you. I just wanted to update you on the progress of my scooter.

Before I continue, I just want to say that this scooter is asking more out of me than I expected. I knew that I would have to go through the safety school to get my licence, my equipment to ride the thing, and of course getting used to and practicing with the vehicle. But buying an older scooter has proven to be more challenging just because of what age will do to a vehicle in general. This has led to further repairs that I had not expected. The strange thing about it is that it seems to be making me fall in love with it more and more. I feel like I'm really taking the care to enjoy the whole experience rather than rushing into the process. Because of this I've grown more appreciative of what I have in front of me. As my first two wheeler, I can honestly say that it feels like it's mine. So that being said, I wanted to write about my experience with painting my scooter. This is probably the biggest labor of love I've put into her.

When I had gotten Lucky, she came with so many broken parts, the paint was scuffed everywhere, and she was cosmetically not in the best of places. I knew that to get her in a better condition and it was going to be much more work. So I decided that if I was going to go through the process of patching her up, that I wanted to paint the whole scooter. I wanted to give the scooter a new lead on it's life. I am now it's 3rd owner and the last owner didn't take the best of care of her. So my first step was to begin with research.

I'll spare you the couple of weeks of exhausting research, you tube videos, and ebooks and tell you the few things I realized:


  • A real paint job with and auto body shop was going to cost me between 1,000 - 3,000 which was so much more than what I paid for my bike. It was also money I did not have.
  • This budget would not have included patching all of the cracks in the body.
  • Paint is great, but what makes a great paint job and overall good bike is a well structured shell. So my cracks would have to be repaired and done right.
  • One last thing: it makes me so sad that the auto painting community has this wave of arrogance and bullying in them. Tearing others down because you could do better doesn't make you any better or help them learn. (Seriously, just read the comments on any auto painting tutorial in a forum or you tube.)

My early concept attempt at a two-toned paint job. I was thinking of a metal flake Bronze bottom. 
So this being said, I went for the poor mans option and opted for spray painting my bike. My father has spray painted a few things before, particularly his trailer frame and hitch for his teardrop trailer which looks fantastic! (I ought to make a post about that) After his advice I decided to go with his favorite brand of Rustoleum. He says that it has the right in between of going on even and not too runny.

I waited on a few days and finally settled on their color of Apple Green. I love the lightness of the color and how it has a cool vintage feeling to it. It was a bit of an homage to the mod colors of the 60s scooters with a clean kick of the green in it. Plus the lighter color would make me safer on the road and be more visible. I had also decided that I was going to go all out and paint a pattern on my scooter. Originally I had wanted a two tone look, but the design of the scooter was too organic and curvy for it to look right. Instead of fighting it, I went with a cherry blossom pattern. It was something nostalgic that reminded me of my teens when I was really into Japanese pop culture. Some of that still reflects in my style, and since my scooter represents freedom and fun in a new lead on my life I thought it was perfect.

Before I continue on with the process I'm going to write a list here of the products that I've been using in case anyone might need to get their hands on these things. I'll also include links when I can to the places that I got them:

Sandpaper Sheets: I've been using these grits- 80 for stripping and smoothing out deep scratches. 150 for the overall sanding of the surface to prepare it for painting. 220 for last minute detail before painting. It's also good to look for sandpaper that can be used wet. Sometimes all the details come out when you wet the body, it's the best way to look for scratches.

Bumper Repair Kit: I've been using Bondo from Pep Boys. Try to look for something with meshing and and squeegee tool to lay out your material. This stuff is also great for bigger noticeable scratches you can't get out with sand paper. My only regret in using this product was how much of it I need to buy. One kit will do about 2-3 major cracks. Then again, my scooter is full of cracks that I didn't know it even had.

Apple Green Rustoleum: This was my choice mainly because of the color. There are so many to choose from. The only downside of my color is the satin finish it has. I'll be making up for this with my clear finish.

Clear Finish from Rustoleum: You've been warned, you will be needed a lot of this stuff! Even in the professional industry a lacquered clear coat on a restored car can be up to 30 layers thick. I'm currently up to my third coat and I think it needs at least three coats more. If there is a sale do stock up, this has cut my paint budget down by half.

Chisel: I would have never guessed how useful a chisel was until I started this project. It gets out most of the gunky sticky stuff on your body. You just need to be very patient with it, but its very effective.

Degreaser: I found the brand called Awesome at a dollar store and it works great!

Dishwashing brush: Trust me, you do not want to get all that grease and road gunk off with your bare hands. Let the brush for all the work for you. Get the ones that look like large tooth brushes, the handle will help you plenty in the long run. Again, I found this in the dollar store.

Spray Paint Handle Gun: This has been such a God send! I can't believe that I didn't buy one sooner. It takes the pain out of spray painting and assures you make even coats to your body. Even if you don't plan on doing a project like this but spray paint a lot, get one.

Paint Brushes: I used acrylic brushes of mine that were getting a little old and frayed. These worked great on all of my detailing after the base coat was laid down.

Testors Model Paints: These are so under appreciated. They have some of the most beautiful intense colors out there. They also go on with the glide of a watercolor. Building up these pigments in the details of my scooter was such a dream. There also super cheap in comparison to vinyl decals. If you have an artistic hand give them a try.

Brush Cleaner: I've been using my trusty Masters Brush Cleaner. If you clean your brushes immediately after using the Testors, they come right off. You will also need this for your hands, even with a spray handle gun, paint will get on you.

Handkerchief or face mask: I learned the hard way that you inhale so much of the left over spray. Cover your face, it will get you sick.

I'm going to end this post here as it seems like this is going to be a long journey. Next post I'll go into detail on how I prepared my scooter and started to get painting.

Thank you everyone for joining me. I hope that these posts will be a friendly and honest way to learn how to repaint an old moped.

Cheers!

0

Azure Blue Scarf

I'm a terrible gift giver. I'm the type thats more likely to apologize and take you out to lunch the next day. Eugene on the other hand is the gift giving master! Love letters, scavenger hunts, surprises, he makes me feel like I suck as a girl sometimes. It doesn't help that he has everything either...

Fortunately I've found a few weakness that we both agree on: Books, Art, Fashion, and Food. I love cooking for him and the way he has that smile that makes him look like the happiest man in the world. However, when I do get him something, I usually add some touches that are all mine. I remember when I bought him a copy of Silmarillion and wrote my own forward on the from page for kicks. The hat he's wearing in this photo was a gift from our 8th anniversary. I added the button after a trip to City Walk and he hasn't  taken it off. Since we've called the hat Teddy Crossbones.

This year I made him an infinity scarf. I've been itching to try my hand at some dye projects and this was first on the list. The scarf is crotchet out of 100% cotton, I then took a silk screen spray and went lightly over it to give it that distressed look. I didn't have the intent of matching it to Teddy Crossbones but it matches perfectly.

The scarf couldn't have come at a better time. Two amazing things are happening very soon. This Saturday we'll be celebrating our 10 year anniversary of being together! That's a decade of growing together, chasing the moon, and achieving dreams. Its so amazing to see that teenage boy grow into the man he is today; I wouldn't have it any other way!

Azure Blue is the color of our non-profit's logo. We will be celebrating 3 years of business by next January. This is a huge deal because most non-profits don't make it past the 3 year mark. We're here to stay bringing theatre to the communities of Los Angeles. Eugene's been having the hardest time finding anything in Azure Blue, so I made him something. 

He loves the scarf and the picture I took of him and Despereaux. Quite dashing don't you think?
0

A Bang Makeover


There's a funny scene in the second Bridget Jones Novel where she expresses that hair is funny in the sense that its fine one minute; then it just goes crazy and all over begging to be trimmed. I couldn't agree with this any better, and this week I just had one of those times.


I'm growing out my hair just a little bit. I realize that I've never really had a proper old fashioned bob! My hair has been short for a good 4 years now and I've been enjoying it after having my hair past my waist for most of my life. I'm not quite ready to go back to long hair, but I do want something not as short as a pixie cut. I also think I could rock an edgy layered A-line bob. That's the plan at least... really I'm trying to be good about it.


My hair affair has me doing something to my hair every other month. You can tell from how often I post a change about my hair. As the body is leaving my hair I got up one morning and decided that I needed to do a little trim.


I planned on getting around to this eventually and got this razor comb from Target. Earlier this week I used it to clean the little bits of hair that are on the back of my neck as my pixie grows out. This little thing is amazing and has saved me a good about of money trimming out the back of my neck as it grows out. This was the first time that I used it on my bangs.


They came out a little shorter than I'd like, but I think I can really rock this look. Something was missing, I think the purple was a bit too contrasting and light for this look. It was fading to a pink at this point so I opted for something darker.


Taking my trusty N Rage Twisted Teal I combed a bit of it through my hair. My assumption was that it would turn a very dark purple. I was wrong! Seems like the rumors online are right that N Rage will cancel out a faded color, because there is no trace left of my Raspberry Kamikaze whatsoever. It came out dark, almost black, the way that it comes out when I usually put it on alone. I did notice however that it was more blue in pigment; must because I bleached it up to platinum this time around...


Tada! Here's the finished product after a good shower for a day out. I'm sure that the blue will show up more after a few washes. One thing I love about dark teal hair is how great it goes with my hot pink lipstick. So I went all out and even did my cat eyes. I'm happy with it and I think this mini makeover will soothe my hair trimming urges for now.

0

Friday Fall Kicks

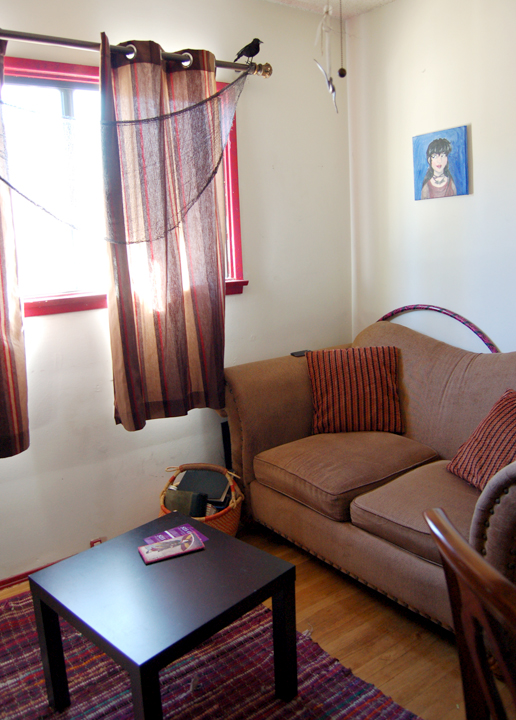
 As we creep up on Halloween, I did a little bit of decorating. I adore the holiday of Halloween. Its spooky, contemplative, and full of costume fun! Come on now, I work in Theatre, this is the one holiday where what I do is oddly normal. I have a packed weekend ahead of me, to finish up this awesome month of October. I thought I would share with all of you out there my quaint Office that's a decorating WIP.

All of my decor is from a Dollar Store, but aside from the garlands, crows, and sign, this is what my office looks like on a regular basis. It was inspired by my love for Venice and the old world feel. All the pieces have been a growing collection. I'd like to brag that it's the coziest room in the house. I do a good share of reading on the couch, and most of my entries as well as my freelance work are done on the office computer.

Meet Hitchcock, my stone owl. I saved him from Love's garden on this past month. He was sitting sunken in the dirt on the front lawn left by the previous owners. He caught my eye when I visited his house and I was smitten by him. He's all dressed up wearing my mini Witch hat. Looking at that hat makes me miss making costumes every now and then. Perhaps when things clear out after NaNoWriMo I'll go back to it.

Kros has been put on guard duty. I never realized he matched the door until Eugene pointed him out. I think I'll keep him there year round, he's a good reminder of how far we've come. He's a souvenir of our first party we threw together; even then there were traces that we wanted to do Productions. I love him for all of this, even the 'battle scars' he's survived after moving through a dorm, and an apartment, and three houses. He even has a monologue created by Eugene somewhere in the vault...

Finishing touches are a candles in the smell of Citrus Cilantro and Mulberry. It's a nice break from the Pumpkin Everything Invasion and Cinnamon smells that seem to follow you everywhere this time of year

  I hope that everyone has a safe Hallo-Weekend planned, filled with goodies and good company!


-Stef
0

DIY: Plus Cut Rocker Tee

DIY: Plus Cut Rocker Tee

One of the cool things about covering events is all the free stuff that you get. IndieCade is one of those events thats very generous in their giving. I'm no true gamer, but the I came out of there with a handful of stuff everyday that I went which was a definite bonus. The stuff is great too! My favorite was the soft shirts that were given by a group called Magnet.

I was able to talk to one of the girls handing shirts out that day, and it seems that the shirts were a promotion for their upcoming movies. Seems like Magnet is a new indie film company that is currently known for their film Hobo with a Shotgun. Any who, the shirts are amazing! Super soft and comfy so I grabbed a few of them.

As a plus sized girl, I love to wear guy shirts because they cover better and have a longer silhouette. Nothing I hate more that sporting a shirt that constantly rides up, and you find yourself through the entire day holding the end of your shirt to the sides of your pants. Guy shirts fit perfectly just below my hips, and that makes me a happy camper. Lately, I've gotten into the shirt cutting craze. I love it because it can turn a comfortable shirt like this one into something flattering.

Pardon the messy room and my pj's ^_^
As you can see the shirt fit pretty well as is, but it wasn't the most flattering look. The sleeves hugged too low and I felt like the collar was a bit constraining. For a pajama shirt this is alright, but I think this would look awesome with a pair of my skinny jeans and my white motorcycle jacket.

I really like the uneven slashes.
I decided to try adding slits through the sides of the shirt. It's been a bit hot lately so I could go for more shirts that breathe.  I usually go for a halter cut with these shirts for give in my breasts area, but the side slits proved to be a good amount of give on the top. The first set of slits I made were too large and I had already stretched the cuts, so the second attempt to thin out the slits came out sloppy. It worked out though and it gave it a really cool slasher look. 
Oh so pretty!
For the sleeves I cut the seam area just above the stitch line. This gave some cute little cap sleeves. I also started with cutting a little into the top seam and it made for this nice keyhole effect. To accent it I cut little slash marks under it. I don't think I'll be doing this cut often on other shirts, but the logo's grunge effect with the cuts are a perfect match.
To think, this is all I really cut off...
I think anyone should try the cut up t-shirt at least once. Go online and get some ideas. There are plenty of tutorials and 'patterns'. Most of all, just have fun with it! Nothing better than going out on a whim trying new things!
-Stef
0
Back to Top